Forwarders in cPanel when customer forwarding is turned off

It’s not always a good idea to allow clients to forward email.  In fact, sometimes it’s a bad idea, and can result in damaged domain reputation and lots of deliverability problems.  You can turn off forwarding for a client by going into Feature Manager in WHM.  Uncheck the Forwarder Manager feature in the feature list and save.

After that, you will need to add necessary forwarders at the command line.

  1. SSH into the server.
  2. cd to /etc/valiases.
  3. Use your preferred editor to edit the appropriate file and save it.

The contents of the file should look like this:

This is the format
Email address to forward: Email address receiving the message

someone@mydomain.com: myotheraddress@myisp.net
*: “:fail: No Such User Here”

Make sure you test!

PHP Update Required warning in WordPress

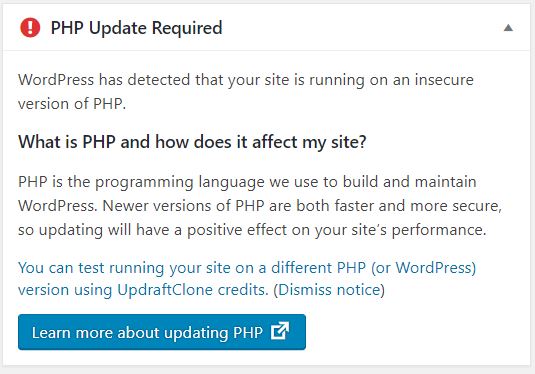
If your WordPress site was built a long time ago, when PHP 5 was in use (or PHP 7.1), you may now be seeing this warning when you login to your WordPress dashboard. It says, “PHP Update Required,” and goes on to tell you that your site is running on an insecure version of PHP.

Image of a PHP update warning displayed by WordPress

It’s important that you don’t ignore this warning. The insecure versions of PHP won’t be receiving any patches or updates.  They are vulnerable to exploits.

Why doesn’t my hosting company just update my PHP? A lot of hosting companies held off on updates until now because many sites will simply break when updated. Some WordPress themes, especially custom-coded themes, were created some years ago, while PHP 5 was still current.  Some PHP syntax has changed since then, which means old code won’t function.

How will I know if my theme will break when I update PHP?  You won’t know until you try it, unfortunately.

If your site was constructed more than 6 years ago, please get in touch with us to work with you to update your PHP and your theme, of needed.


Set up two-factor authentication for your cPanel account

Hosting customers may use two-factor authentication (2fa) to better secure their cPanel accounts.  2fa adds an extra level of security. It requires a smart phone app called Google Authenticator, which is available for Android and iPhone.

You should be familiar with the steps required to install an app on your phone before you begin.  Unfortunately, we cannot provide support for your smart phone as a part of our hosting support.  If you need help with this, please make an appointment for a 30 minute support session at our office.

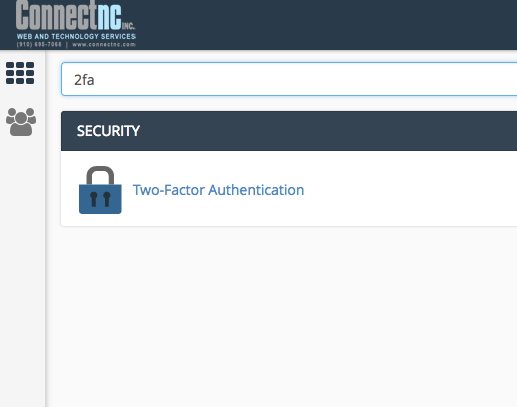
First, login to your cPanel account and then use the search to find 2fa.  You will see Two-Factor Authentication, as pictured below.  Click on that.

Two Factor Authentication

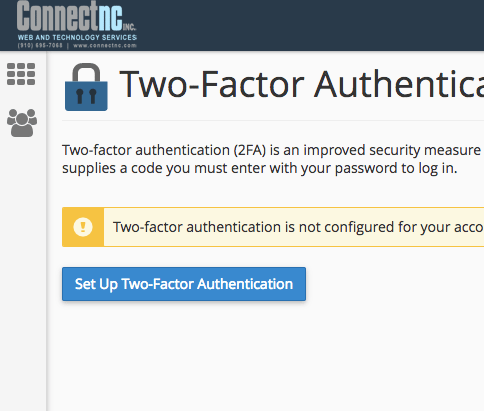
Next, click the blue button that says, “Set Up Two-Factor Authentication.”

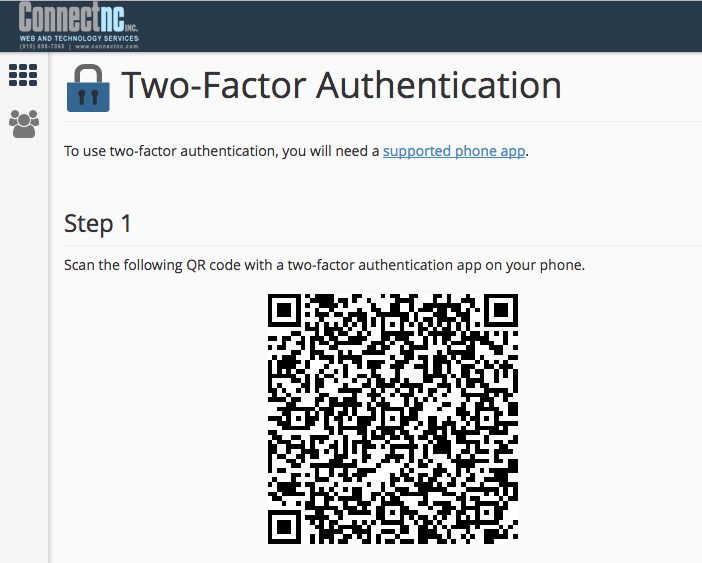
Scan the QR code with your smart phone.

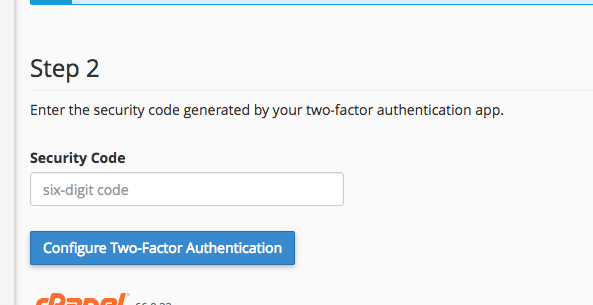
Enter the code in the space provided.  Click the button that says, “Configure Two-Factor Authentication.”  You must already have the Google Authenticator app on your phone in order for this to step to complete.

Accept the server name displayed on your smart phone.

From now on, you will need the smart phone app to successfully login to your cPanel account.

You can reconfigure or remove 2fa by logging in to cPanel and clicking on “Two-Factor Authentication” again.

How to generate a CSR in IIS 8

Generating a certificate signing request on Windows Server 2012, with IIS8

Open IIS 8 Administrator and choose the appropriate web server.  Double click on “Server Certificates.”

step1

Choose “Create Certificate Request.”

step2

Fill in the blanks.

step3a

Choose 2048 as the bit length.

step4

Save the CSR someplace where you can easily find it.

step5

Click “Finish.”

step6

Under construction pages

Are you redesigning your website? Tip of day is to keep your old site up or at minimum put up an attractive HTML page with company information, contact information and a form.

How do I change my email password in cPanel?

ConnectNC hosting customers and their employees or other users can perform a variety of tasks without assistance from tech support personnel.  One of those tasks is changing an email account password.  There are a few simple steps to follow:

  • Login to your webmail account at http://mydomain.com/webmail, where “mydomain.com” is your actual web domain name.
    Log in to webmail
  • Once logged in, click on the “Change Password” link.
    Change your email password
  • Either create a password, or allow cPanel to generate one for you by clicking on the Password Generator button.  Make sure you write down youe password and store it in a safe place!
    cPanel password generator
    Email password generator

We require the use of strong passwords.  This protects you, ConnectNC and all of the other users on the ConnectNC network.  When weak passwords are used, there is the possibility that they can be easily cracked, making the account vulnerable.  Vulnerable accounts may be used by spammers and phishers.  When that happens, the Internet users who are the victims of the attack launched using your account receive junk mail that could have been prevented! Some ISPs will block our IP addresses after our customers’ accounts were used to spam.  It is for these reasons and more that we require users to have strong passwords.

Configure your iPhone or iPad for ConnectNC Hosting

  • On your iPhone or iPad, tap the Settings icon and then choose “Mail, Contacts, Calendars.”
  • Choose “Add Account.”
  • Scroll down and choose “Other.”
Tap “Add Mail Account.”
Type in your name, your full email address, your email account password and something to describe this account.

Type in your actual email address here. Do not use “mydomain.com.”

Scroll down to enter the incoming and outgoing mail server information.  Both incoming and outgoing will be the same.  Replace “mydomain.com” with your actual domain name. Your user name is your actual email address.

If your email address is @pinehurst.net or @connectnc.net, please use these mail servers:

Incoming Mail Server:   mail.connectnc.com
Outgoing Mail Server:   mail.connectnc.com

Your username is your full email address.

If, at any time, you are presented with an alert that asks if you set up the account without SSL, tap Yes.  Click Next to continue.
Save your settings when prompted.

Setting up a Windows Mail Account

Before you set up Windows Mail, start by collecting the following information for each e-mail account. You will need to enter this information during the setup process:

Your e-mail address and password.

The address of the incoming and outgoing e-mail servers used.

Most people know their e-mail addresses and passwords, but many people get confused when asked to enter information about e-mail servers. This is easiest if you gather some basic information from here before you begin adding accounts in Windows Mail.

E-mail server types

Windows Mail supports three types of e-mail servers. You don’t need to understand the details about these server types; you just need to find out which one your e-mail service uses both for incoming and outgoing e-mail:

Post Office Protocol 3 (POP3) servers. Most e-mail services and ISPs use this type of server, especially for personal e-mail accounts. They hold incoming e-mail messages until you check your e-mail, at which point they’re transferred to your computer. Messages are typically deleted from the server when you check your e-mail.

Internet Message Access Protocol (IMAP) servers. These servers let you work with e-mail messages without downloading them to your computer first. You can preview, delete, and organize messages directly on the e-mail server. Copies are stored on the server until you delete them. IMAP is commonly used for business e-mail accounts.

Simple Mail Transfer Protocol (SMTP) servers. This outgoing mail server handles the sending of your e-mail messages to the Internet. An SMTP server handles only the outgoing e-mail, and is used in conjunction with a POP3 or IMAP incoming e-mail server.

Top of page

Incoming and outgoing e-mail servers

Once you know the type of e-mail server used by each of your e-mail accounts, you must find out the address of its incoming and outgoing e-mail servers. During the setup process, Windows Mail requires you to enter the address of each e-mail server. There are only two types of incoming servers to choose from: POP3 or IMAP.

Before you set up an e-mail account in Windows Mail, you need to know the address of the incoming and outgoing e-mail servers used by your e-mail provider

POP3 is by far the most common type of incoming e-mail server for personal e-mail accounts. And SMTP is the only type of outgoing e-mail server that works with Windows Mail, so you normally don’t even need to check the outgoing server type with your e-mail provider. Practically all personal e-mail accounts — with the exception of web-based e-mail — use an SMTP server for outgoing e-mail.

E-mail server addresses usually have the same format. Most ISPs (named “mydomain” in this example) have server addresses like this:

Incoming server: mail.mydomain.com.

Outgoing server: smtp.mydomain.com

You can usually substitute the name of your ISP in place of mydomain in the example above. If this doesn’t work, check with us. Questions about e-mail server addresses are among the most common inquiries e-mail providers get, so they usually have this information posted in the support section of their websites.

Finally, you must know whether your outgoing e-mail server requires authentication, since there is a check box for this when you set up a new e-mail account in Windows Mail. If you can’t find out the answer from your e-mail provider, try sending a test message with the check box selected and another one with the check box cleared, to see which works.

Step by step

Once you have collected the required information for each e-mail account, you can start setting up Windows Mail. Here’s how to add an e-mail account in Windows Mail:

Open Windows Mail by clicking the Start button , clicking All Programs, and then clicking Windows Mail.

Click the Tools menu, and then click Accounts.

Click Add.

After you click Add on the Internet Accounts screen, Windows Mail will ask what type of account you want to add

Click E-mail Account, click Next, and then follow the instructions.

After you are done entering all the information for one e-mail account, repeat the process for each e-mail account you want to set up.

Note

During setup, you’ll be asked to pick a display name. You might want to enter your actual name here rather than your e-mail address, since this is the name that recipients will see when you send them an e-mail message.

Adding new email accounts to your hosting account

Every ConnectNC hosting account comes with a CPanel control panel.  CPanel makes managing your hosting account easy!  To create a new email account, please watch the following video tutorial (opens in a new window):

http://www.cpanel.net/media/tutorials/emailaccounts.htm